How to renovate your kitchen
Are you dreaming of a kitchen renovation? A complete do-over that will take your space from drab to fab in no time? Picture it – an inviting space that’s warm and comforting as soon as you step inside, a place where friends and family gather for meals, laughter and good times.
Whether you’re planning a full-scale home renovation or just want to spruce up your existing space, this guide will help you get ready for successful kitchen renovation.
What are the benefits of kitchen renovation?
- Improved functionality: A kitchen renovation can make your kitchen more functional and efficient, with better storage, counter space, and improved appliance placement.
- Increased home value: A renovated kitchen can increase the overall value of your Whistler home, making it more attractive to potential buyers.
- Enhanced aesthetic appeal: A kitchen renovation allows you to personalize your space and create a kitchen that reflects your style and tastes.
- Increased energy efficiency: Upgrading to energy-efficient appliances and lighting can reduce your energy bills and help the environment.
- Better use of space: A renovation can help you make the most of your available space, with custom cabinetry, island seating, and other design features.
- Improved safety: Installing new appliances and updating electrical and plumbing systems can improve the safety of your kitchen.
- Reduced maintenance: Upgrading to new materials and finishes can reduce the need for ongoing maintenance, such as repainting or replacing worn-out surfaces.
- Better organization: A Whistler kitchen renovation can help you better organize your kitchen, with better storage solutions and improved work zones.
- Enhanced atmosphere: A renovated kitchen can improve the atmosphere of your home, creating a warm and inviting space for cooking, dining, and entertaining.
Planning your kitchen renovation
To successfully conduct your Whistler kitchen renovation, you need a strategy. And strategy is a detailed plan for every step of the way. So what are the steps you need to undergo and plan before you even start?
Budget
The first step in planning a Squamish kitchen renovation is to create a budget. Consider how much you’re willing and able to spend on the project, taking into account any savings or loans you may need to finance the job.This will help you determine what kind of project you can engage in. It’s also helpful to set aside some money for unexpected expenses that may arise during the home renovation process.
Needs and wants
When revamping your culinary space, it is important to determine what you need versus what you want. Your “needs” are the items that are essential for making the kitchen functional such as appliances, countertops, cabinetry and plumbing fixtures. Your “wants” are those added extras that give the room a personal touch like tile backsplash, range hoods and upgraded accessories.
Research and inspiration
Start with a broad vision. Consider how you want the space to look and feel when the project is complete. Create a ‘vision board’ of all the ideas that capture your attention and reflect on which ones pull at your heartstrings.You can also write down a few ideas of what you would like to include in your kitchen. Narrow down your search. Determine what is realistic for you in terms of budget and time constraints.
Designer
Even if you have a clear idea about what you need and want, consider hiring a home designer. They have the necessary skills, knowledge, and experience to help you design a functional and aesthetically pleasing kitchen.A designer can help you access a wide range of resources that you’ll need for your project and offer creative solutions.A designer can help you avoid costly mistakes, save time by handling the project from start to finish and relieve stress and pressure from the whole renovation.
Contractor
Once you have your budget in place, it’s time to find the right contractor for your project. Look for someone who has experience doing similar projects in the past and take the time to read reviews from previous clients.Check their certifications or licenses that could add credibility to their workmanship. Meeting with contractors in person will also give you a better idea of their capabilities before making a decision on who to hire for your job.In addition, be sure to communicate clearly with your contractor about what changes need to be made and when they should be completed so that both parties are on the same page throughout the entire process.
Permit
Before any work begins, make sure that you have all the necessary permits from local authorities so that your renovation runs as smoothly as possible.
Create a timeline
Once you’ve settled on a vision for the new design, create a timeline for completing each step. Consider how long each part of the project is going to take, from ordering materials to installing fixtures, and pad the timeline with extra time for unanticipated problems or changes in plans.
Having a plan not only ensures that everything gets done on time but also helps keep costs down by avoiding costly delays or last-minute changes of heart.
Plan kitchen layout and design for renovation
Start by sketching out a basic floor plan on paper or using a virtual tool like RoomSketcher. This will help you visualize how the elements of the room should fit together in order to achieve maximum efficiency and beauty. Remember that great design focuses on both form and function.
Demolition
Once you have a plan in place for your new kitchen design, you can start tearing out the old fixtures and appliances. Remove existing cabinetry, countertops, sinks, and backsplashes. Consider plumbing or electrical changes before tearing out these items such.
PRO TIP
Don’t forget about safety gear! When completing tear out and demolition tasks for your kitchen renovation project, make sure you invest in protective eyewear, gloves, masks and other safety equipment for your own wellbeing.
Structural build out for kitchen renovations
Structural build-out includes installing walls and ceilings, as well as laying down the foundation for any new appliances or fixtures you’re adding. It also involves framing out cabinets and countertops, making sure they are properly secured and level.
Plumbing and electrical rough in for kitchen renovations
Locate your main plumbing and electrical lines so that they can be accessed during the renovation. Plan for adequate ventilation for appliances like stoves and dishwashers, as well as lighting fixtures for task areas like islands or counters.
Once you’re done, you can start running the pipes and wires needed for sinks, garbage disposals, refrigerators, ovens, microwaves, dishwashers — whatever new features you’re adding to your dream kitchen!
HVAC rough in for kitchen renovations
Getting the HVAC rough-in setup correctly is essential to have an energy efficient kitchen. This includes making sure all ducts, vents, fans and pipes are in place before any insulation or drywalling takes place.
Laying flooring
Before laying the new flooring, the existing flooring must be removed and the subfloor should be inspected for any damage and replaced or repaired if needed.There are several types of flooring options available for kitchens, including tile, hardwood, laminate, and vinyl. Once the flooring material has been selected, it’s time to prepare the surface for installation. This may involve installing a moisture barrier, underlayment, or adhesive to ensure a secure and long-lasting installation.
The flooring can then be installed according to the manufacturer’s instructions. This may involve laying out the tiles or planks in a specific pattern, cutting the material to fit around cabinets and appliances, and securing the flooring with adhesive or grout.
PRO TIP:
When laying the flooring materials down, take small pieces at a time so that it doesn’t shift when walking over it. This will help create an even surface and prevent any gaps from forming between adjacent pieces. With this simple tip in mind, your kitchen renovation project will be complete before you know it!
Installing walls and ceiling
Walls and ceilings serve as the foundation of the kitchen’s structure and provide a base for cabinets, appliances, and lighting fixtures to be installed.
To ensure that the new walls and ceilings are even and provide a professional finish, it’s important that any bumps, dents, or holes are filled in with a joint compound and sanded down to create a smooth surface.
Once the walls and ceilings are smooth, it’s time to install the drywall. Drywall comes in large sheets that can be cut to size and screwed into the studs of the wall or ceiling. The seams between the sheets of drywall should be covered with a joint compound and tape, then sanded down to create a seamless appearance.
Placing doors and windows
Before placing doors and windows, it’s important to consider the layout of the kitchen and the functional needs of the space. For example, windows should be placed to provide natural light while minimizing direct sunlight on work surfaces, while doors should be placed for easy access to the kitchen from other areas of the home.
Consider the size, shape, and style of the windows and doors. Larger windows may provide more natural light but may also be more difficult to install and maintain. A larger door may provide easier access to the kitchen but may also take up valuable wall space. Both should also match the overall aesthetic of the kitchen.
Ensure that they are properly installed and sealed to prevent drafts and moisture from entering the kitchen. This may involve installing weatherstripping or caulking around the edges of the door or window frame.
Painting the kitchen walls
Choose a color scheme that is appropriate for the type of atmosphere you want to create. Neutral colors are always a safe option, while bolder colors can make a statement and add some personality to the space. Some colors can make your kitchen feel larger or more cozy. Don’t rush your selection. Get a designer’s help, experiment and try out your colors before you decide.
Installing plumbing fixtures
Plumbing fixtures such as sinks, faucets, and dishwashers are essential for the functioning of the kitchen. By now, you should have the placement and layout of the supply and drain lines planned out. You should also be sure that the existing plumbing system can accommodate the new fixtures.
The sink should be properly mounted and sealed to prevent leaks and damage to the surrounding cabinets and countertops. Faucets should also be properly installed and connected to the water supply lines, with any necessary valves and fittings installed to ensure proper water flow and control.
The dishwasher should be properly leveled and secured to prevent movement or leaks. Ensure that the drain line is properly connected and that any necessary air gaps or check valves are installed to prevent backflow.
Choosing and installing cabinets
Kitchen cabinets are a key component of any Whistler kitchen renovation project, as they not only provide functional storage but also contribute significantly to the overall aesthetic appeal of the space.
As with other kitchen elements, choose a style that complements the overall design of your home and intended functionality. What will best suit your needs? Do you need space for pantry items? Is there enough space for all of your pots, pans and other cookware? Determine which material will best fit with your overall vision for the kitchen.
Choosing and putting in kitchen countertops
How to choose your countertops?
- Consider the budget: Different materials will cost different amounts so this should be taken into account before making any decisions.
- Assess durability: Kitchen countertops take a lot of wear and tear over time, so consider how long-lasting each material may be before settling on one.
- Think about color: Different colors can create different looks in a kitchen, so consider which shade will match with existing décor and appliances.
- Look at maintenance requirements: Certain materials require more care than others, so factor this into your decision-making process as well.
- Consider resale value: If you’re planning to sell your home in the future, certain countertop materials may offer better returns than others.
Once you have chosen your kitchen countertops, it is important to ensure that they are properly installed. This can be a complex process, so I’d recommend using contractors. They’ll measure, create a countertop template, cut, fit and align with the rest of the kitchen elements.
Adding a backsplash
A backsplash is a practical and decorative addition to a kitchen renovation project. It serves the purpose of protecting the wall behind the sink or stove from splatters and stains while also adding a stylish touch to the kitchen. The material of the backsplash has a big impact on the overall look and feel of the kitchen. Each has its own unique characteristics and advantages, such as durability, ease of maintenance, and aesthetic appeal.
Make sure that it is properly aligned and securely attached to the wall. The installation process can vary depending on the material chosen, but typically involves applying adhesive and laying the tiles or other material in place. Grout is then applied to fill the gaps between the tiles and create a seamless and polished look.
Bringing in appliances
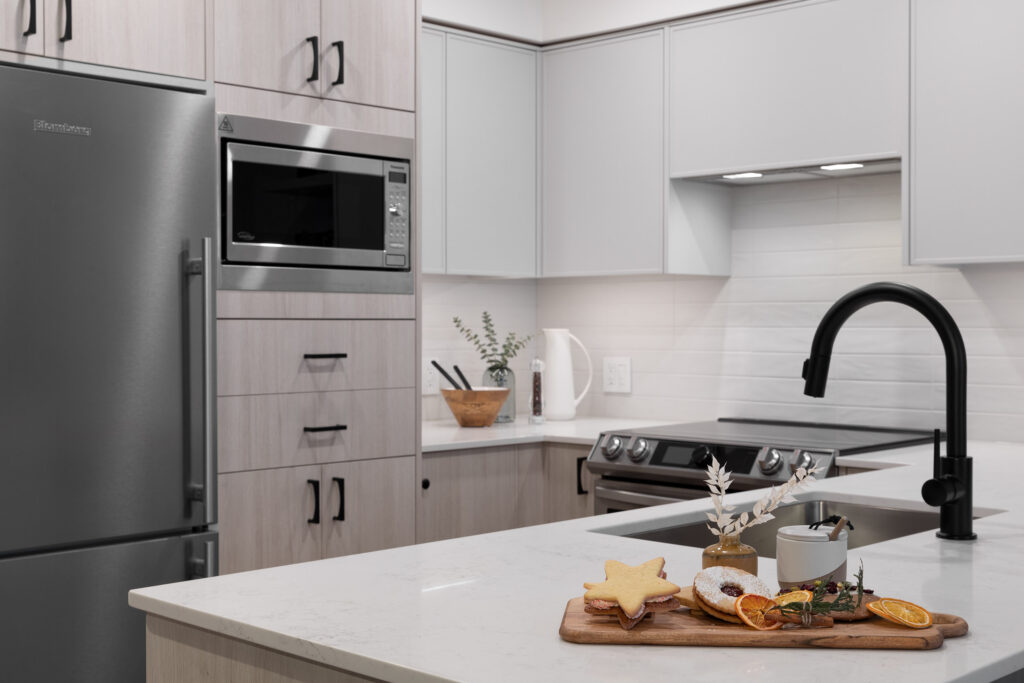
As the saying goes, “A kitchen is the heart of a home”. It’s where families gather for meals and conversation. Bringing in appliances to a Squamish kitchen renovation is an exciting moment that helps bring it together. At this stage of kitchen renovation, you should know what appliances you are bringing in based on your needs and wants.
Final inspection
A final inspection is a crucial step in any kitchen renovation project, ensuring that all work has been completed according to the agreed-upon plans and meets local building codes and regulations. During a final inspection, a qualified inspector will thoroughly examine the kitchen renovation project, checking for compliance with local building codes and regulations, examining electrical and plumbing work, verifying that all necessary permits have been obtained, and ensuring that all work has been completed to a high standard of quality.
If any deficiencies or safety issues are identified during the final inspection, the contractor will be responsible for addressing them before the project can be considered complete.
Structural: A professional inspector will examine all structural elements of the kitchen, including walls, floors, ceilings, cabinets, lighting fixtures, and more.
Electrical: It’s essential that wiring and electrical components meet safety standards so an inspector will check that everything is properly installed and functioning correctly.
Plumbing: Pipes will need to be considered in order for water lines and drains to work properly without any leaks or blockages.
Once the final inspection has been completed and any necessary changes have been made, the kitchen renovation project can be considered complete. This means that the homeowner can begin using their new kitchen with confidence, knowing that it has been constructed to a high standard of quality and safety.
Conclusion
In conclusion, a kitchen renovation can completely transform the heart of your home, providing a functional and beautiful space for cooking, entertaining, and creating memories. From updating cabinetry and countertops to adding new appliances and lighting, a kitchen renovation can increase your home’s value and improve your quality of life.If you’re considering a kitchen renovation in Whistler or Squamish, contact us and we can help you bring your vision to life.


